TL;DR
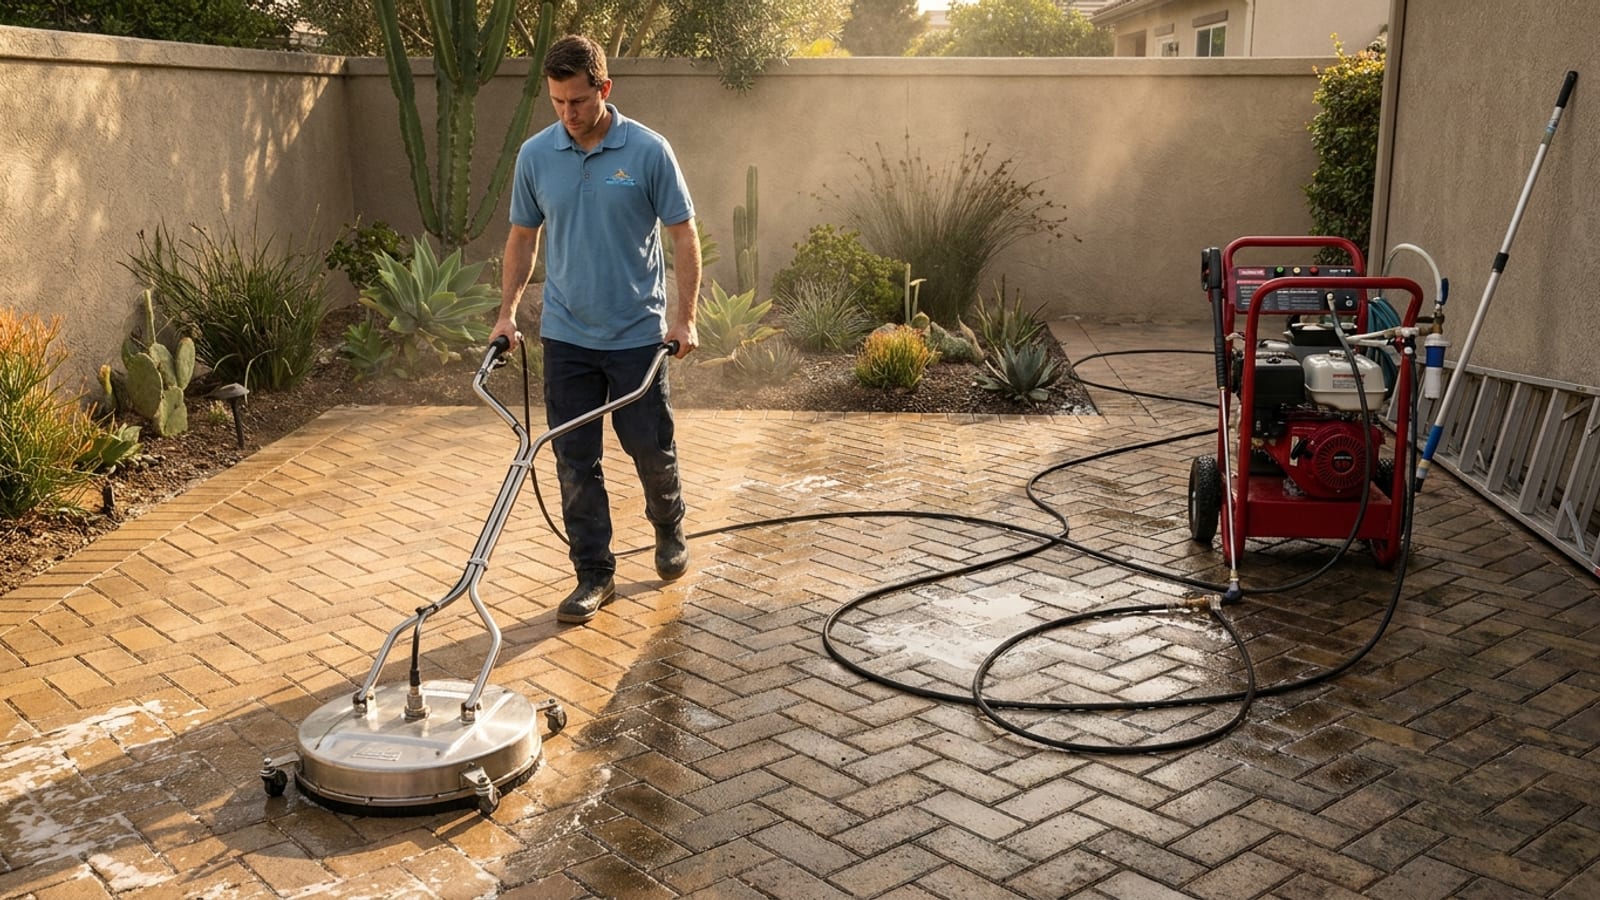
- Never use a bare wand on pavers. A round surface cleaner at 1,800 to 2,500 PSI is the only method that cleans without destroying the joint sand.
- After a real cleaning, you must re-sand with polymeric sand. It’s not optional. Missing this step means weeds and shifting within a season.
- White haze on your pavers is efflorescence, not dirt. It needs a dedicated efflorescence cleaner, not more pressure.
- Wait at least 48 hours of dry weather before sealing. Sealing wet pavers traps moisture and turns the whole surface cloudy.
Point a bare wand at a paver patio and within a few minutes you’ll have clean-looking pavers and zero joint sand. It’s the single most common paver-cleaning mistake, and it turns a cosmetic job into a structural one. The sand that fills the joints holds everything in place. When it’s gone, the pavers start to shift, weeds take root in the gaps, and ants tunnel in from underneath. Fixing it requires re-sanding the entire surface before it gets any worse.
This guide covers the right way to clean pavers, what to do about that chalky white residue that keeps coming back, how to re-sand after cleaning, and when to call a pro instead of spending a weekend on it yourself. Most paver stone cleaning jobs in San Diego run $250 to $600 for a typical patio or driveway, so if the work is significant, the math often favors hiring it out.
Why paver cleaning is different from concrete cleaning
Concrete is a monolithic surface. You can hit it with a surface cleaner at 3,000 PSI and nothing structural happens. Pavers are individual units held together by a sand-filled joint system. The pressure that cleans the surface also blasts the sand right out of those joints if you’re not controlling it.
That sand isn’t just filler. It distributes load across the pavers, prevents lateral movement, and blocks weed seeds from reaching soil. On top of that, most San Diego pavers were installed with polymeric sand, which is activated by water and then cures into a semi-rigid, weed-resistant joint. Once it’s gone, plain sand is a stopgap, not a real fix.
The method matters here in ways it doesn’t on a plain driveway.
The tools you need
Pressure washer. For residential pavers, 1,800 to 2,500 PSI at 2 to 3 GPM is the target range. Less than 1,800 PSI and you’re not lifting embedded algae and staining. More than 2,500 PSI on a surface cleaner increases the risk of dislodging sand faster than you can control. If your machine only goes to 3,200 PSI, turn it down using a variable-pressure tip or reduce your RPM if it’s gas-powered.
Round surface cleaner. A 15-inch consumer surface cleaner ($90 to $120) or a 20-inch pro unit works fine on a patio. The spinning arms inside the shroud distribute the pressure evenly instead of concentrating it. This is not negotiable for pavers. Without one, you’re guaranteed to lose sand.
Fan-tip nozzles. A 25-degree green tip for edges and a 40-degree white tip for gentle rinsing. The red zero-degree tip does not belong anywhere near a paver patio.
Pump-up sprayer. A 2-gallon unit for pre-treating detergent and any specialty cleaners.
Pre-treatment detergent. A sodium-hypochlorite-and-surfactant mix at 1 to 2 percent for general grime, algae, and mildew. Let it dwell 5 to 10 minutes before you start cleaning.
Efflorescence cleaner. If you have that white chalky haze, you need a dedicated efflorescence remover. These are typically diluted hydrochloric or phosphoric acid-based products. Follow label dilution rates and keep them off metal fixtures and adjacent plants.
Polymeric sand. Alliance Gator, SEK Surebond, or similar. This is the re-sanding product you’ll sweep in after cleaning. It activates with a fine mist of water and then cures into a semi-rigid joint. Buy enough to fill all the joints on the surface, not just the ones that look thin.
Paver sealer (optional). If you’re sealing after cleaning, choose either a wet-look gloss sealer or a natural-finish matte depending on your preference. Water-based acrylic sealers work for most residential applications.
Step-by-step: cleaning pavers the right way
1. Clear the surface and pre-wet landscaping
Move furniture, pots, and anything else off the patio. Wet down plants and lawn within 8 to 10 feet. The detergent you’re about to apply will burn leaves if it sits too long without rinsing.
2. Pre-treat with detergent
Fill your pump-up sprayer with a sodium-hypochlorite-and-surfactant solution. Apply it across the whole surface, covering evenly. Let it dwell for at least 5 minutes. If it starts to flash off in the sun before you’re ready to clean, mist it again. Heavy algae growth, which is common on shaded patios in Carlsbad, Encinitas, and La Jolla where the marine layer keeps surfaces damp, will visibly lighten as the chemistry works.
Don’t skip pre-treatment to save time. Pre-treating with chemistry means you can clean at lower pressure and still get a better result.
3. Attach the surface cleaner and start cleaning
Set the surface cleaner flat on the pavers and keep even, overlapping passes. Walk at a slow, steady pace. The nozzle arms spin continuously, so the cleaning is even as long as you keep moving. Overlap each pass by about 20 percent and work in a consistent pattern, either parallel to the long edge of the patio or along a straight reference line.
Do not stop in one spot. The spinning nozzles will etch a ring if you pause.
Stay off the leading edge of joints when possible. The surface cleaner will still pull some sand out, especially on older installations where the joint sand has already settled or degraded. This is normal and expected. That’s why re-sanding comes next.
4. Edge with a fan tip
Switch to the 25-degree green tip for the border pavers and any edges the surface cleaner can’t reach. Hold the wand at a low angle, 6 to 8 inches from the surface, and move continuously. Don’t linger. The goal is a clean edge, not a sand-free one.
5. Rinse thoroughly
Rinse the full surface with the 40-degree white tip. Rinse any plants, landscaping, and hardscape that caught overspray. Clear the gutter if dirty water ran into the street.
6. Let it dry before re-sanding
This is where most people get impatient. The pavers need to be fully dry before you sweep in polymeric sand. If you apply it to wet or damp pavers, the sand activates prematurely and won’t cure correctly. Minimum wait is a few hours in direct San Diego sun. Ideally, let it dry overnight.
Re-sanding with polymeric sand: why it’s mandatory
A surface cleaner running at 2,000 PSI will remove some joint sand on every pass. Even if you’re careful, you’ll lose material. On pavers that already had thinning joints before you started, the cleaning will expose bare gaps.
Leaving those gaps open means:
- Weed seeds settle in within weeks
- Ant colonies establish under the surface in months
- Water gets under the pavers and undermines the base
- Adjacent pavers start to shift over time
Re-sanding is not a finishing touch. It’s part of the cleaning process.
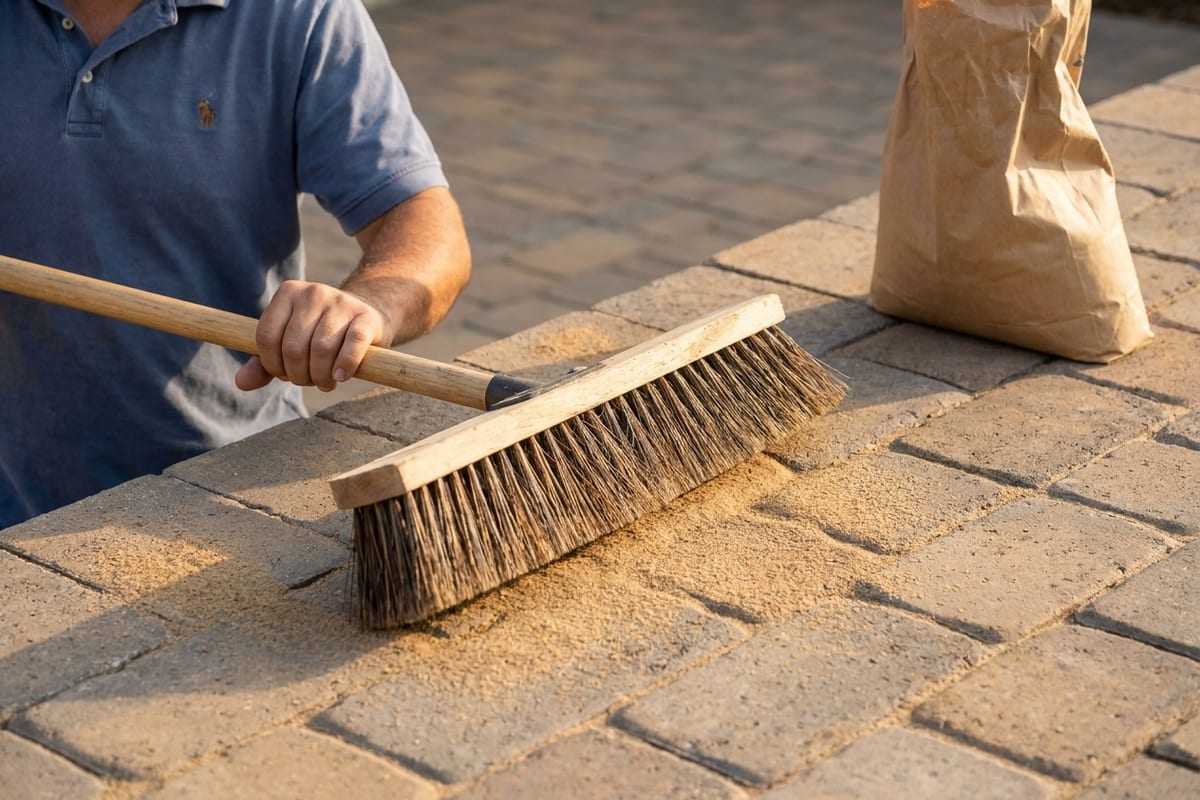
How to apply polymeric sand. Pour it onto the dry paver surface and sweep it into the joints with a push broom. Work it into the joints by compacting lightly with a plate compactor or hand tamper. Sweep off all excess from the paver faces. Any polymeric sand left on the surface when you mist will harden there and leave a haze.
Once the joints are full and the faces are clean, mist the whole surface with a fine spray. You’re activating the binders in the sand, not washing it out. Use a gentle spray setting, not the pressure washer. Let it cure for at least 24 hours before foot traffic and 48 hours before vehicle traffic.
Efflorescence: the white haze that isn’t dirt
Efflorescence is one of the most common complaints on San Diego pavers, especially on coastal properties in Oceanside, Del Mar, and Coronado where salt air contributes to mineral migration. It shows up as a chalky white or gray film on the paver face, often appearing weeks or months after installation or after rain.
It’s not dirt and pressure alone won’t clear it. Efflorescence forms when water moves through the paver body, picks up calcium and mineral salts, and deposits them on the surface as it evaporates. The more moisture movement through the paver, the more it builds up.
To treat it properly, use a dedicated efflorescence cleaner. Products like Sure Klean 600 Detergent or similar diluted acid-based cleaners are the standard. Apply per label directions, scrub with a stiff bristle brush (not wire), let it dwell, then rinse thoroughly with plenty of water. Multiple applications may be needed on heavy buildup.
After treatment and after re-sanding, sealing the pavers slows future efflorescence by reducing the amount of water that can penetrate the surface.
Sealing after cleaning and re-sanding
Sealing is optional, but it makes the next cleaning easier, slows weed growth in the joints, reduces efflorescence, and improves stain resistance. Most San Diego homeowners seal every 2 to 3 years.
The rules on timing are firm. The pavers need to be completely dry, not just dry on the surface. After cleaning and re-sanding, wait at least 48 hours of dry weather. If you’ve had coastal morning fog, add another day. Sealing over residual moisture traps it in the paver body, turns the surface milky white, and requires stripping the sealer to fix.
Apply sealer with a low-pressure pump sprayer or a roller. Two thin coats beat one thick coat. A thick coat traps air bubbles and looks uneven. Let the first coat fully cure (check the label, usually 2 to 4 hours) before applying the second.
For more detail on the timing and products, see when to reseal pavers.
San Diego-specific conditions to watch for
Coastal algae and mildew. Homes within a few miles of the coast in La Jolla, Solana Beach, Pacific Beach, and Carlsbad deal with persistent algae growth on north-facing or shaded patios. The marine layer keeps surfaces damp most mornings. Pre-treating with a sodium-hypochlorite mix and then cleaning every 18 to 24 months controls it. Sealing after cleaning further slows regrowth.
Salt air and efflorescence. Coastal properties see more efflorescence because salt air accelerates the moisture movement through the paver body. If you’re near the water, budget for efflorescence treatment as a regular part of your maintenance cycle.
Inland hard water staining. In Escondido, El Cajon, Poway, and Alpine, sprinkler systems running on hard water leave white mineral deposits that look like efflorescence but are calcium carbonate from the water supply, not from the pavers. The treatment is similar but often responds faster to milder acid rinses. A driveway cleaning or patio visit from a pro who understands the difference in chemistry saves a lot of trial and error.
Santa Ana season and organic debris. Hot, dry Santa Ana winds push leaves, bark, and organic debris into the joints and onto paver surfaces. This material holds moisture against the pavers and encourages moss and algae to establish. A rinse after major wind events is worth doing.
When to call a pro
Some paver situations are genuinely worth hiring out. Here’s when DIY stops making sense:
The paver area is over 500 square feet. At that size, rental fees, supplies, and a full day of labor cost almost as much as a professional service.
The joint sand is already gone or severely depleted. Re-sanding a large area requires a plate compactor and the right technique to fill joints evenly. Without the right equipment, you’ll end up with surface pockets and uneven curing.
You have heavy efflorescence across the whole surface. Multiple acid-treatment cycles over a large area, done safely and without harming adjacent landscaping or metal fixtures, is a professional-grade task.
The pavers are showing movement or have started shifting. Cleaning won’t fix a base problem. A pro can identify whether the issue is just sand loss or whether the base material needs attention.
You want to seal after and want it done right. A bad sealer application on pavers is expensive to fix and hard to strip. Pavers that were sealed wet or over-applied look worse than unsealed.
Our paver stone cleaning service covers pre-treatment, surface-cleaner pass, efflorescence treatment where needed, joint inspection, and full rinse. We can also handle re-sanding and sealing as part of the same visit. Typical patio runs $250 to $500. Larger driveway-scale jobs with sealing run $500 to $900 depending on square footage and condition.
For a full picture of pressure washing services across San Diego, we cover everything from patios to roofs to commercial properties.
Call (858) 925-5546 or request a quote online. Upfront pricing, same-week availability in most areas, and service across all of San Diego County from Oceanside to Chula Vista and inland to Alpine.